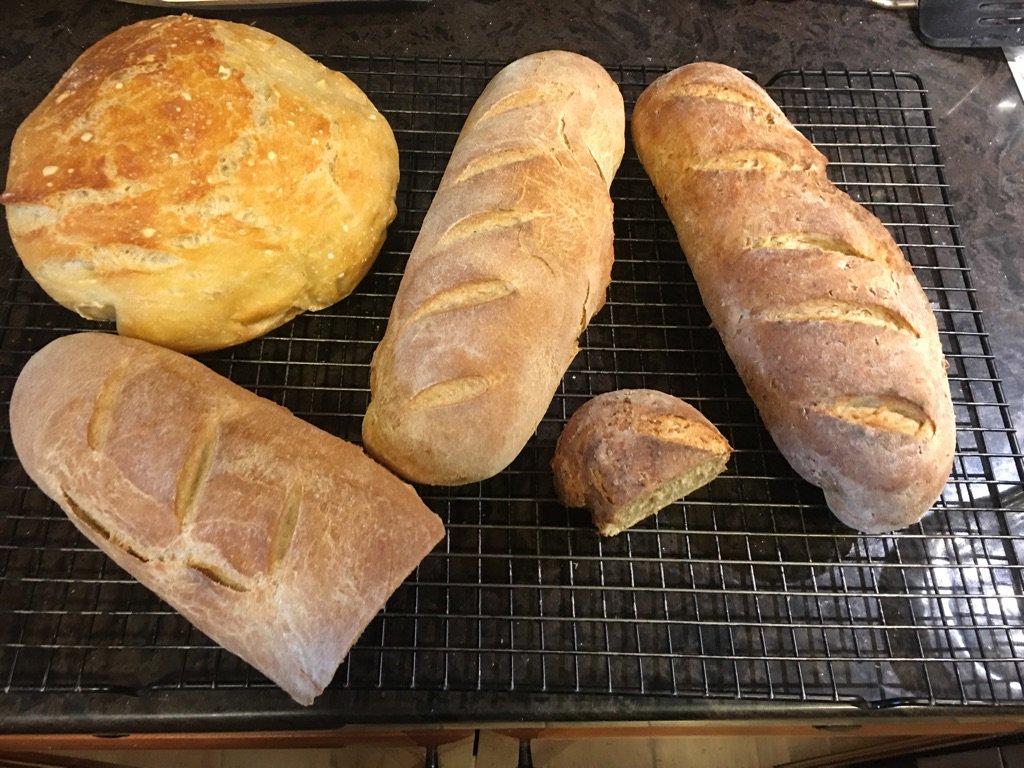
Realistically, 'french bread' should be a baguette. That's pretty much THE bread in France. But because we're Americans and we always get this stuff wrong, it's not. Instead, French Bread is more or less the same bread, but in the shape of a batard, or a torpedo.

French bread is a lean bread, meaning it doesn't use oil, nor sugar. I put a little sugar in to get the yeast going, because I have a big container of active dry yeast, whereas most recipes for home cooks call for instant yeast. I'm pretty sure by the time it gets to the bread, there's little to no sugar left. That's what the yeasties ate.

To get the shape of a batard seems to require two things: A properly rolled dough that has been pinched and sealed to create surface tension so that it rises upward, not outward. It also requires being baked on a stone (or in a french loaf pan, but I don't have one nor do I think it's necessary). The stone provides even heat radiating from the bottom which seems to help create that perfect crust.

The last trick I have for french bread is to put about half a cup of water into a small metal pan at the bottom of the stove, which is situated to the side (so the steam can more easily travel upward). This steamy environment helps provide that perfect crust which is essential to a proper french bread.

The ingredients here are super simple:


  • 4 cups bread flour (or as I use, 4 cups AP flour and 1 tablespoon of Vital Wheat Gluten)

  • 1 1/2 cups lukewarm water (I go for right around 110 degrees)

  • 1 tablespoon active dry yeast (many recipes call for less, it's possible I'm using too much but it seems to work for me)

  • 3/4 tablespoon kosher salt (many recipes just call for salt; I use kosher salt which has lower volume due to ragged crystals, so I have to increase the amount by 50% to be correct).

  • 1 tablespoon sugar.

First, add the sugar and the yeast to the lukewarm water and stir to combine. Set aside until the yeast is ready, which means the water has a nice thick head of foam on it, like a really serious beer might.

In the meantime, whisk together the flour, gluten if using it, and the salt. Place in a stand mixer and put in the dough hook.

When the yeasts are bubblin' and troublin', pour the water in, and turn the standmixer on one of the lower settings until combined. Because the density of flour changes considerably due to many factors, you may have to add a little flour or a little water to get to the right consistency. For me, that consistency means that there's a little bit of stickiness to the bottom of the bowl, but it doesn't stick to the sides. Once combined, allow the dough hook to knead it for 3 minutes.

Take it out of the mixer, remove the dough hook, cover the bowl with a cloth and let sit for 20 minutes. This phase is called the autolyse phase, and it allows the gluten to hydrate which will give a better structure to the bread later. My experiments show this phase definitely matters.

In 20 minutes or so, take your lump of dough and turn it out onto a floured surface. Knead the dough by flattening out with your knuckles and palms, then fold it in half, rotate a quarter turn and repeat. I find it takes 10-12 rotations to get the dough ready. You can tell it's done kneading when you push a knuckle into it and it springs back most of the way fairly quickly, and the rest of the way after a short time. When it's fully kneaded, pull the corners down and pinch them together so you have a nice, tight little dough ball. Place in an oiled bowl, oil the top, cover and place in the refrigerator for an overnight rise.

I like the overnight rise a lot. This gives the yeast time to do their thing, which is to eat up the rest of the sugar and some of the starch and provide flavor. In the refrigerator it slows things down a little. The No Knead bread did its thing on the countertop, and the flavor from that was fantastic. As an experiment I want to try to let this rise on the countertop once and see if it's different. Maybe I'll do a batch, split it into two and let one rise on the counter and the other in the refrigerator to see what happens. Anyway, I digress.

The next day, pull your dough out of the refrigerator. Give it an hour or two to warm up; I find that the chilled dough is hard to work with at first, so warming it up makes things easier. Punch the dough down and flatten it into a rectangle. Cut the rectangle in half.

I'm not fully there on all the experiments I can try with rolling the dough, but what's working for me right now is this one: wet the top of the dough just a little bit, then fold one side of the dough so the edge is about halfway. Use the palm of your hand and smash this down so it forms a nice little seal. Wet and fold this side again so that it's now about 2/3s of the way across, and then pinch and punch that down to seal it. Finally, wet and fold the remaining third across and seal it all the way down. Fold the end just a little bit and pinch that closed.

Place the dough, seam side down onto a cookie sheet, oil the top, cover with a towel and set aside to rise for 30-60 minutes.

In the meantime, preheat your oven and baking stone to 450 degrees. Give this one a good long time to heat to make sure that the baking stone is fully hot. Place a pan at the bottom of your oven (or you can just throw the water on the bottom of the oven, but the one time i tried that I didn't think the results were great. With that much surface area it evaporates very fast).

Once the dough has risen, take a good sharp knife and make several diagonal slashes across the top of the loaf. These slashes allow the bread to continue to expand while cooking; without them it'll crack (and even with them I've had a couple loaves crack along the sides, so perhaps I need to make longer slashes). I find that if I oil my knife a bit first, I get slashes without tearing the dough. Otherwise the dough likes to stick to the knife and will drag a bit.

I put the cookie sheet directly onto the baking stone. It's a lot easier than transferring the dough and potentially deflating it, and the cookie sheet should conduct the heat just fine. It seems to work great for me! Make sure the sheet is to one side so the pan has a clear path for steam to get up above the bread; it wont' do any good if it's all trapped underneath. Pour 1/2 cup of water into your nice hot pan, which should shoot steam up at you so be a bit careful.

Bake for 20-25 minutes (i'm finding 24 is the right number for my oven) and remove. Allow to cool a bit. If you can. I never can, because hot fresh bread.
So on Christmas, I was going to make buttermilk rolls, a thing I found on Thanksgiving that I really adored.

I've had a lot of misfires in the past with bread. At its core, bread is simple and easy, but there's so many variables that I don't understand that I've had trouble controlling to get to the attributes I want. I also want something different from a sandwich bread that I want from a crusty batard that I want from a nice soft dinner roll or a sandwich roll.

So in general, I've always been disappointed with the bread I made.

Until I made the accidental french bread. You see, what happened was that I was making pizza dough, something I've had a lot of success with. And I got all the way to the end of the process, and I had the dough all set out ready to be balled up and stuck in the fridge for the overnight rise, and I noticed I forgot to put the oil into the dough.

For a pizza dough, I was pretty sure I was going to want that oil. I make a butter based crust, which is a bit richer and that oil makes it a bit sturdier so that it holds up against all the toppings. There was no way that was going to be right. I was just going to have to redo it.

So I did, I made a NEW batch of pizza dough, this time with the correct ingredients.

But what to do with the old batch? It'd be a shame to throw it away, right? So I gave it an overnight rise, shaped it into loaves and I baked it the next morning. After all, if I bake it and it sucks, and THEN I throw it away, all I've lost is the time and energy spent on the oven, but I have a chance to gain a bread. If I was lucky, I figured, it'd be edible.

The shape turned out terrible, it went very flat. But the flavor was remarkable, and I'd managed to get the crusty exterior and the soft and dense and chewy with a small crumb (that's the holes inside the bread) that I really want in that kind of bread. It was so good I way overate of it (and have been all week, but that's part of why I'm taking 2 weeks off, so I can do these experiments with no guilt).

And so I ended up serving that bread at Christmas. There were no leftovers.

Afterward, I was still thinking about the deliciousness of that bread, and I went researching, and then I went experimenting. Since that experiment, I've now made 5 different batches of bread (each making two loaves) and supervised Charlotte through a loaf. I made another french loaf, a multi-grain, a half-whole-wheat (i.e, half white flour, half whole wheat flour), a stout rye (made with oatmeal stout) and a chocolate rye (made with chocolate powder).


Ostensibly this is all prep for New Year's Eve. I need lots of good, tasty fresh bread for dipping into cheese, and I'm going a bit extra to make sure the bread is all safe for a guest with a severe soy allergy. But also, it's kind of fun and I'm learning a few things.

So I'm no expert on bread by any means yet, but I want to record and share the things that I think led to success:


  • For each recipe, I've modified the recipe back to the proportions I used on the basic french loaf to try and minimize the number of new things I'm trying. This makes it easier to compare what the differences are. As I expand, I will change one or two things on a loaf and see what the differences are.

  • The overnight rise has been absolutely key to that yeasty flavor in the bread. The french loaf I did without the rise was just a touch on the bland side in comparison. So everything I've done is doing the overnight rise, despite what the recipe called for. (The no-knead bread actually sat out for 20ish hours and took on a bit of a sourdough flavor because of it).

  • Using a pan with water in the bottom of the oven and cooking between a pair of preheated baking stones helped ensure the correct texture. The even radiant heat coming from above and below is, I think, an important aspect.

  • I spent some time experimenting with ways to roll the bread up. The one I'm using currently has proven to be a little phallic so I'm going to try to fix that, and I've also had some issues making sure my pinch gets a tight seal, but I've dealt with that by adding some water to the pinched area. I think this is because I like my dough on the dry side, as it's easier to work with, so the pinch won't seal without some wet.

  • I don't keep bread flour around, but I do buy AP flour in 25 pound bags. But I can add vital wheat gluten to my AP flour and bam, it's bread flour. This is even more important when working with other flours such as whole wheat and rye in order to get that texture to hold up right.


As I get to it, I'll follow up with some recipes and where my inspiration has come from. For now, everything I've done has been in the shape of the french batard (torpedo) and they're all lean breads (with no oil and only a little bit of sugar to get the yeast going). Everything else has been to swap out some of flour for a different ingredient. I haven't yet tried a full whole wheat bread, for example, or a full rye, but I'll give that a shot.

So far, my absolute favorite has been the multi-grain, so I think I'm going to experiment with variations on that and see what sticks.

The classic American breakfast skillet can be found in nearly any greasy spoon/diner restaurant in the country. Just like the American eggs breakfast itself, there are nearly infinite variations on the theme, but typically it is a bed of potatoes with other stuff and eggs on top. In a restaurant, the eggs are any style. My personal preference is over-easy because I really like the way warm runny egg yolks mix with potatoes.

This is my version of the classic, but really any ingredients that sound good can go in this. I use a mix of small red, yellow and purple potatoes but any potato will do. Remember that sturdier potatoes hold up better to frying. It is traditionally served in a small cast iron skillet, but as my kitchen does not contain skillets that size and style I just use a shallow bowl.


  • 1 tsp butter or olive oil
  • 4 small potatoes, diced
  • 1 small shallot, diced
  • 1 clove garlic, minced
  • 1/4 tsp ground thyme
  • salt and pepper (to taste)
  • sprinkle of grated cheese
  • 2-3slices bacon, chopped
  • 1-2 eggs, any style

Heat the butter or olive oil in a skillet over medium high heat. When ready, sauté potatoes, shallot, garlic, salt, pepper and thyme. When potatoes are warmed and starting to crisp, reduce heat and allow to cook for 20-30 minutes. Be careful not to burn the outsides while waiting for the potatoes to cook through. I've found that microwaving the potatoes ahead of time can greatly reduce the cooking time but I haven't done it enough times to give specific timing advice.

Put the potatoes in the bowl in a single layer. Put the bacon on top of that, then the cheese and finally the eggs. Serve immediately!

Other excellent ingredients are anything you might put into an omelette. Ham, sausage, mushrooms, peppers, etc.

Posted via LiveJournal.app.

I've ressurected the recipe database onlogrus.com so I will now be posting the recipes there with a link to them here. At some point I will be going through my Livejournal recipe posts and redoing them there so that I have them all in one place, but that takes time, energy, effort and a lack of procrastination.

Because this is one of Charlotte's favorite dishes, I'm making this at least once every two weeks, sometimes more often. This and the ground turkey burritos are easily the most common dinners in our house right now.

My spaghetti bolognese recipe
This isn't a real frutti de mare by any stretch. For one, I skip a lot of steps that are important to making sure the quality of everything is what it should be. That said, a lot of the time I need to cook something simply, so that it doesn't take a lot of actual interaction time (even if it takes a fair bit of simmering time).

Part of the secret here is that Trader Joe's carries an impressive one pound bag of frozen mixed seafood -- shrimp, calimari, octopus and scallops -- for about six bucks. Normally I use this in stir fry with oyster sauce, but I've not done a lot of stir fry of late. And today I wanted pasta.

The other secret here is that I have a basic go-to tomato sauce that I use as the basis of at least a dozen different dishes. I change it up just a little depending upon the needs of the dish. That go-to recipe exists thanks entirely to Mark Bittman, whose "How To Cook Everything" really is a phenomenal book for not only explaining how to cook everything, but what it is about the food you're cooking that really matters. Also, this is a pantry food; I can make this entirely from ingredients that I keep around at all times, either in the freezer or in the pantry.

Finally, the exact bits I used here are because I had to do last minute rebalancing because I underestimated how much liquid is in the seafood.

Read more... )
Adapted from a recipe I found on allrecipes. The lemon juice is really what makes this one.
Read more... )
Costco is evil, because some of the time when I go there I come back with a 3 pound pack of fresh tilapia fillets which pretty much have to be cooked within a day, two at the outside, or they're gone. And the smallest packages I can get are usually 10 fillets. And naturally my expected dinner count was low, so there's lots of leftovers for this. Luckily tilapia makes great sandwiches, so lunch is taken care of for a bit. Unfortunately, Sprout doesn't really like the rice medley, she only likes white rice.

Read more... )
Many years ago, I came up with a jambalaya recipe I was pretty happy with, after scouring the internet. Truth be told, I know very little about jambalaya. Nowhere I've ever lived is within 2 states of New Orleans, so proper cajun food isn't something I'd been exposed to. That particular recipe was pretty good, and there's nothing at all wrong with it.

But the jambalaya I made to tonight? A thousand times better.

It uses fewer ingredients. Also, what I made wasn't quite traditional -- because nobody in the house particularly likes bell pepper. And [livejournal.com profile] esmerel can't do spicy. And one of the ingredients I don't normally keep around the house. But none of that matters, because what's important is the technique.

We picked up a copy of The Gumbo Shop's cookbook. The Gumbo Shop is a New Orleans staple, and we were told over and over again while there that they were the place to go. And it was pretty darn good.

I honestly wasn't expecting much of the recipe book. But it has a couple of tidbits that are important. While I won't copy the recipe verbatim, I will share the information that was the most important:

1) Since chicken is an important ingredient of the dish, boil the chicken, with bones, for 45 minutes. Remove the chicken from the bones and use that. The stock you made will be the stock you use for the rice.

2) Cajun food has a method called "stick and scrape" where you cook the vegetables -- onions and tomatoes especially -- very hot in cast iron and let it stick to the pan until it's almost but not quite burnt, then scrape it off. This caramelizes the vegetables and adds layers of flavor that you can't get any other way. I'm convinced this was the secret to the flavor of tonight's dish. Doing this in the same oil used to cook the sausage, of course, imparts a bunch of the sausage flavors into the vegetable melange.

I'm also convinced that using squash as a replacement for bell pepper in almost any dish is pretty much acceptable. Not authentic, but I don't go for authentic. I go for food my family enjoys.

For what it's worth, the complete ingredients list I used goes like this: Chicken pieces, smoked sausage, shrimp, tomatoes, onion, squash, long grain rice, chile powder (california chili powder specifically; very mild), black pepper, salt, canola oil.

Will make again.
As this is Live Journal post type, er, 4 or whatever, the Food Post, the rest of this is behind a cut for those who don't care.
Read more... )
To be honest these are so simple that they're barely recipes. They are certainly not earth shattering. Mostly the difficulty is that it's time consuming since you have to bake for 75-90 minutes.

Read more... )
So there's an asian grocery near us called Seafood City that has whole fish that you can get at great prices and they will clean the fish for you while you wait. They'll also fry the fish if you want, too, though I'm not exactly sure how. Maybe I'll test it it with a small, cheap fish sometime and see.

In any case, I brought home a cleaned 11 pound salmon. Andrew filleted it, which is good because I'm terrible at deboning fish. So this was a bit of a tough part. That said, I can get filleted salmon if I want, but not for $2.99/lb for a fish of this quality.

We took one side of the fish (the other is in the refrigerator, awaiting another terror) and decided to grill it on a cedar plank.

First things first. You need cedar planks. A couple years ago we spotted a batch of cedar planks treated for cooking at Costco, picked them up on a lark and they got stuck in the pantry and forgotten. You need to soak the planks in water. A minimum of 20 minutes according to the directions, but for cooking a fish of this size that was actually too short. Properly used the cedar planks are reusable. Sadly while they cooked the fish properly, these planks were too burnt to be reused. We have more, though.

So figure on soaking the plank(s) you use in water for a good hour, at least.

SEcond, we mixed whole white and green peppercorns, fennel seeds, coriander seeds and cumin seeds and roasted them in a small skillet until they were good and aromatic. Then we ground them up in the mill. The salmon side was cut in half, liberally salted and then coated in the spice mix. The fillets were then put on the bbq grill on low for what turned out to be about 25 minutes.

These were deLICious. I should've taken a picture of them for this, but alas, I did not.

I'd say that we got about 4 pounds of salmon out of this side of it, and the 8 (5 adults, 3 kids) of us devoured those 4 pounds and there's roughly 1 serving of the fish left. We served them simply with some garlic mashed potatoes and steamed broccoli. My tummy is very happy.
Because I do love cornbread. This resembles Boston Market's, but it's less oily, which is good. I find theirs to really get too heavy after awhile. This one I gobble up.

Preheat oven to 375. Butter or cooking spray an 8x8 or equivalent pan.

Dry:
1 cup corn meal (white or yellow)
1 cup AP flour
1/4 cup white sugar (up to 1/2 cup if you like it sweeter)
1 tablespoon baking powder
1/4 teaspoon salt

Wet:
1/2 stick (4 tablespoons) melted butter
1/4 cup honey
1 cup milk (increase this if the batter is very thick. It should end up
about the consistency of pancake batter)
2 large eggs

Whisk together the dry ingredients in one bowl. Whisk the wet
ingredients in another. Make a reservoir in the middle of the dry. Pour
the wet into the dry and mix together.

Pour into the pan. Bake 25-35 minutes until a toothpick comes out of the
center dry. If you're going to err, err on the underbake than overbake.
Being a touch too moist in the middle is better than too dry.
This was a late "Hey I have some chicken I should use, what can I do?" idea that I did a little internet research on. Spaghetti Monster bless allrecipe.com because the reviews there have gotten really good. Very insightful commentary really gives a lot of information about what's good and bad about a recipe, and seeing how two dozen people modify a recipe and what their results were gives a lot of information about what is really important about a recipe and why it's structured the way it is. Really good stuff and I am a much better cook because of this wealth of information. Kudos to allrecipes.

After doing a bit of research, I found a honey mustard chicken recipe that had many raves and had a really interesting twist: curry powder. In particular, one review suggested a bit of garam masala, and having tasted both I thought that sounded fantastic.

Honey Mustard Curry Sauce


  • 1/4 cup melted butter

  • 1/4 cup spicy brown mustard

  • 1/4 cup prepared yellow mustard

  • 1/4 cup honey

  • 1 tablespoon curry powder

  • 1/2 tablespoon garam masala

  • 1 teaspoon salt

  • Garlic to taste (I like garlic, so there was lots)


Whisk all ingredients until smooth.

Baked chicken with sauce


  • Chicken pieces.


I happened to have chicken thighs and drumsticks available in the freezer. Many reviewers used boneless skinless chicken breasts. I am sure they are fantastic, but they are going to be a little more sensitive to being overcooked. I would use more butter and very carefully monitor temperature when cooking white meat chicken. Since I used dark meat, I felt comfortable not monitoring the temperature. It can overcook.

I laid out what turned out to be, after I thawed it out, 6 thighs and 10 drumsticks across two baking dishes. I split the sauce equally between them, used a brush to ensure they were completely coated and left the rest in the bottom of the dish. Covered both with foil and baked at 350 degrees for one hour. Removed the foil, basted the chicken with the sauce and then broiled for another 15 minutes.

Many of the recipe comments suggested serving this on a bed of long grain and wild rice. Given the Indian accent to the dish, long grain definitely appealed, and I liked the idea of wild rice for texture. Conveniently I have some wild rice sitting around that I've had for...a long time. It'd been sitting for so long in part because my last attempt to cook it failed miserably. This time, I prepared. You'll want to start the rice a little bit before your 1 hour timer goes off.

Long grain and wild rice


  • 2 cups long grain rice -- such as basmati

  • 1 cup wild rice

  • one quart container of chicken stock

  • Spices to taste. In my case: Tarragon and thyme seemed like a nice complement to curry (and tarragon is probably the herb I reach for most often with rice, and thyme is a very close second). And a pinch of salt.

  • A teaspoon or so of butter or some other oil


This is your basic pilaf, but the two grains must be cooked for different lengths of time. Start by melting the butter in a saucepan, and then coating the wild rice in the butter and cooking for a couple of minutes. You can tell it's ready by the lovely aroma the wild rice gives off when it's good and warm. Add in the chicken stock. Bring to a simmer, reduce heat to the barest simmer you can manage, cover and let this go for 25 minutes.

Then add the white rice and spice. Stir and cover. Set your timer for 15 minutes. When finished, let cool, then fluff.

I served this with a random frozen vegetable on the side -- in this case peas and carrots -- but any vegetable you find appealing is nice here, I think. We like peas a lot because the little one loves them.

Result


This was freakin' fantastic. I was worried it would be too mustardy. It was not. I was worried it would be to curry-y. (Not a word, I know). It was not. I was worried it would be too sweet. It was maybe on the edge, a little less honey would probably be okay next time. Or as Pamela suggested, maybe use coconut milk which would create a completely different experience. Still. Awesome. Totally awesome. a+++++++ would buy again.
After a shopping trip, we had tilapia. We also had mushrooms. Rather a lot of mushrooms, as we *already* had mushrooms that I had forgotten about. Whoops. So it became necessary to use them, and of course tilapia must be cooked quickly lest it go all fishy.

After doing a little research, I decided that a bed of soft polenta would be tasty, and covering it with a mushroom cream sauce would work. Adding a little sherry to the sauce would add character. What I came up with was well worth it. I even forgot the cheese on the polenta (and a bite of the polenta without the sauce shows it) but it didn't really matter.

The polenta


I've never made polenta before, so I wasn't sure what I was getting into. Turns out it works a bit like malt o meal, which I make for breakfast once a week or so.


  • 2 cups broth (vegetable or chicken. I see no reason any other broth would not work here)
  • 2 cups milk
  • 1 cup corn meal
  • 1/2 tsp salt
  • 1/2 cup shredded parmesan cheese (I saw many recipes call for many different kinds of cheese; they all went for strong aged white cheeses, though).


Heat the broth and milk in a sauce pan, add the salt. When it boils, reduce to a bare simmer. Add the cornmeal *slowly*, whisking constantly to keep it from lumping up. Also, be very careful when it starts really thickening, as it will spatter. That hurts, trust me. When the corn meal is all merged in, cook for another 20 or 30 minutes on low heat. Whisk in the cheese.

The sauce


  • 1 pound of sliced mushrooms. I had brown crimini mushrooms.
  • A spoon full of crushed or chopped garlic
  • 4 tablespoons butter
  • 1 tbs (maybe more) corn starch
  • a cup (roughly) of broth (same as above)
  • a cup (roughly) of milk
  • 1/2 tsp of ground thyme
  • 1 tablespoon (or so, heh) dry sherry)


Saute the mushrooms and garlic in the half the butter. Most recipes call for onion or scallion here, but I had none. I think scallion would work well; if you have one, chop a scallion or two and saute them at the same time.

When the mushrooms are good and sauteed, add the corn starch and combine with the remaining butter. I find that the mushrooms are good at soaking up the butter so I actually had to add a little more here; you may not need the full 4tbs. Once the corn starch is fully integrated with the butter, add the milk, stock and thyme. Heat to a simmer, then simmer for a time to thicken. Add the sherry when it's nearly done. THe measurement on the sherry was "pour some in". Actually to be fair, it was on the stock and milk, too.

The fish


The fish is pan fried very simply in a small amount of butter with salt and fresh ground pepper; cooked until tender and flakey.

Plating


Spoon out some polenta. Flatten. Put a small spoonful of the sauce on the polenta. Put the fish on top of that, and then another spoonfull of the sauce on the fish. Enjoy!
We were at Costco today and dover sole was $3.49 a pound, the cheapest fish there. For $3.49 a pound I had to get some, but I have no idea what to do with sole. So after a little sole searching (thanks google) I found half a dozen interesting stuffed recipes that I took what I liked from.


  • 1 Costco sized package of dover sole fillets. This turned out to be 25 fillets. They're very thin.
  • 4 slices of bread -- we use fairly wide loaves so if it were normal loaves I'd say 5.
  • 1/2 to 1 onion, diced.
  • Butter -- I won't say how much because I used too much (it was still very good but didn't need to be that buttery), so we're still going to have to guess. At the moment I think probably not more than 3 tbs, divided into two parts.
  • 1 can lump crab meat
  • A handfull of cooked, tail off shrimp -- theoretically canned shrimp will do but I had none. I did have frozen, cooked tail on shrimp, and I used, literally, a handful. I chopped the shrimp pretty fine.
  • Dried parsley
  • Ground sage
  • Dried thyme
  • (Sorry I didn't put rosemary in this)
  • 1 tablespoon of chicken soup base -- Costco started carrying the "Better than boullion" brand which is better than the Minor's brand I used to use.
  • Salt
  • Old bay
  • paprika (I used smoked, spanish paprika and it is a good flavor)

The stuffing:
Dry the bread in a 200 degree oven until all the moisture is out of it. Try not to toast the bread, so put the oven as low as you can get it and still actually dry the bread. When it's dry, break it into chunks and grind it up in a food processor until you have crumbs. Sure, you can buy bread crumbs if you want, but this really isn't that much work and it's much better than stale bread crumbs.

Melt the butter in a pan and sautee the onion until soft. Combine melted butter, onion, crab meat, chopped shrimp, parsely, sage, thyme, soup base and a little bit of salt. Add enough liquid to turn the stuffing into a nice, thick consistency.

Butter a baking dish; lay fillets out flat. The sole fillets are so thin I decided to double them up. I brushed melted butter and sprinkled a little salt between teh two layers if fish; place a bit of the stuffing at one end and roll the fish up, then stand on its side. I added a little more stuffing to the top of most. Brush remaining butter on the outside of the fish, sprinkle with old bay and/or paprika, or frankly whatever else you like. Bake at 350 for 25 or so minutes. THe fish should be flaky, but you don't want to overcook this.

Serves 6.
I made the sausage soup again.

This time I left out the carrot and diced 2 zuchinis; I used 2 scallions, cooked early with the sausage. And I salted the potatoes prior to cooking (this pulls some of the liquid out of them which is then replaced with liquid that is generated putting it all in with the sausage. Tasty).
But I can make stuff up.

To be fair, [livejournal.com profile] esmerel and her mom went shopping. I worked.

Five o'clock rolled around and it came time to figure out what dinner was going to be. I didn't feel like spending a bunch of time and energy cooking, but everything I could think of required an hour or so of prep.

But we did get some Italian sausages at costco, and we had some potatoes.

So I started there... )

I'm definitely keeping this recipe in my repertoire; if I can get the beans going in the afternoon, actually preparing the soup is not that much effort, and it's quite filling, tasty, and it's pretty different from everything else I cook.
I need to do a better cherry pie filling, though.

That said, the savory ones...oh goodness, YUM.

The meat:

  • 1 package ground turkey (1.25 pounder)
  • 2-3 cloves chopped garlic. I am lazy and I like garlic, so I buy a big thing of chopped garlic from Costco. It's not as good as fresh garlic but it's close enough for me, and using more helps make for it. I use a big heaping tablespoon full.
  • Herbs that sound good: In my case, ground thyme, french sweet basil and ground oregano.
  • Salt to taste (I use a big pinch of kosher).


Brown the meat in a skillet, adding in all the ingredients. Ground turkey doesn't have much runoff, so there's no need to drain. Set aside.

Mashed potatoes, standard fare:
Cut and boil 3ish potatoes. I like gold potatoes, of course. These happened to be 'yellow'. Mash with buttermilk + milk, butter and a little salt until creamy.

Combine the meat and mashed potatoes. Divide into two. In one half...or if you want, don't dive...add 1 tablespoon of garam masala and 1 tablespoon of sweet curry powder. Mix thoroughly.

Use as a filling for pocket pies. I used Alton Brown's recipe but I didn't have any shortening so I substitued butter one for one and put the butter in the food processor, as I've done with pies in the past. The butter crust browns a lot more than the shortening crust.

I made a double batch of the skin; had enough for 40+ pies. Most of them savory, as above, 5 or so with cherry pie filling, another 7 with some raspberry filling (frozen strawberries + sugar + flour, reduced in a saucepan for about 20 minutes), and the last few with some chicken & cheese salvaged from leftovers, just to use the last wrappers. They'll be yummy too.
Ok, I have shown that I can now make Dou Miao (lots on that page, do a search for it) in my wok on the grill. Awesome stuff.

I also continue to make a kick ass beef & broccoli, but that's not new. Well, it's new in that I haven't done it since I moved in, as the grill I need for it was broken last summer and it gets dark too early to use the grill for woking outside of daylight savings time. Also, rain is an impediment.

Here's the recipe:

SAUTEED DOU MIAO WITH GARLIC
Serves 6
1/4 cup vegetable oil
6-8 large garlic cloves, crushed and peeled
1 pound dou miao , preferably large
teaspoon salt
cup water

1/4 cup oil IS quite a bit, but that turns out to be pretty close to what I used. It really soaks it up; I will have to try to use a little less. Definitely use as much garlic as you can stand, and 1 tsp salt may not be quite enough.
I found the recipe on the weight watcher's site, so tonight I made Shepherd's Pie.

Naturally, I am basically unable to make any recipe to spec. I always think I know better, and make changes.

Of course, usually I decide I was right.

Like this time... )

Profile

merlinofchaos: (Default)
merlinofchaos

February 2019

S M T W T F S
     12
3456789
10111213141516
171819 20212223
2425 262728  

Syndicate

RSS Atom

Most Popular Tags

Expand Cut Tags

No cut tags
Page generated Jun. 9th, 2025 04:37 pm
Powered by Dreamwidth Studios